Day 28 - May 24, 2014

The plane's interior will be painted later this week, so a few students spent the day scuffling and scrubbing the cockpit clean. And that includes the tight spots, too!


While work was being done inside the cockpit, the canopy was detached and the epoxy resin on the fiberglass was sanded down.

The vertical stabilizer skins were riveted on to the skeleton assembly, completing that section. The group then moved on to rudder construction and began some deburring and match-drilling. Spar caps were positioned and riveted onto the main spar component.


The engine group worked on attaching the fuel return assembly and cleaning up some pieces with acetone. Additionally, some work was done on the spinner assembly. Specifically, the spinner was trimmed and sanded, while the pitot tube was installed.


Day 27 - May 17, 2014

Fiberglass work has officially begun on the canopy, as the first few layers were adhered on with an epoxy solution. All students were given a quick instruction on the basics of the fiberglass process, i.e. the techniques of applying and creating the epoxy. They were given the opportunity to try out some epoxy application with some scrap pieces of the fiberglass and metal. Essentially the fiberglass is applied on the plane to help relieve the surfaces of any noticeable edges. It helps streamline and create a smooth, professional finish to the contour of the plane.


On to the empennage. Students spent the day assembling the skeleton of the vertical stabilizer. Students helped flute ribs, match drill some holes and rivet components to the main spar, before finally riveting both ribs and spar together. Skin attachment will follow.


Work continued as usual on the cowlings and the engine. A pair of students worked on assembling the fuel tank drip trays. While prep work began for trimming the tailcone fairings.


Day 26 - May 10, 2014

Earlier in today's session, the students were given a mini lesson on aerodynamics and the purposes of the stabilizing surfaces of the airplane, i.e. the antiservo tabs, 
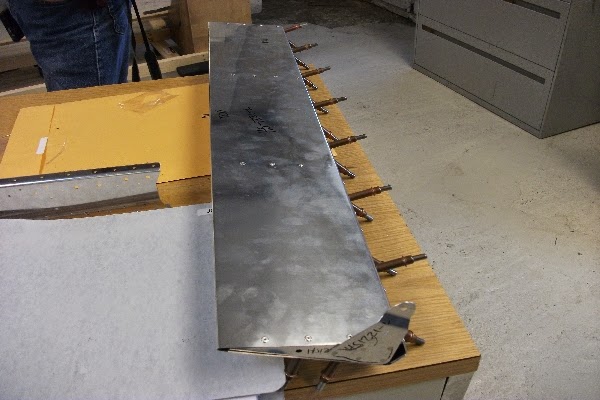
stabilator, rudder. Then work commenced on the various sections. The stabilator was finally completed, with the anti-servo tabs and counterbalance weight attached. The assembly was set aside for future use and work quickly began on the vertical stabilizer, prepping the skins and ribs.


As for the canopy, fiberglass work was the next step. Some students started tracing and cutting out fiberglass pieces in preparation for the layering.


A couple students reverted back to landing gear components and learned the process of wheel balancing using an awesome homemade mechanism by Mr. S.Vangrunsven. Others helped with attaching the cooling shroud to the cylinders.


The hangar was especially packed today with some unfamiliar faces. Today was the official TeenFlight 3 Open House, so family, friends, and curious individuals filled the room observing the students as they worked. Guests were able to see all the various projects currently in progress, and were treated to a slide-show presented by previous TF students on their experiences flying the TF2 plane. The TF1 plane also made a special appearance, so visitors and guests were able to see the 'final product'. Everyone enjoyed themselves and were all equally impressed with the work and diligence shared among the students and mentors.


Thank you to those of you who generously gave a donation to the Airway Science for Kids Program, your support helps promote aviation among younger generations and allows amazing opportunities, like TeenFlight, to exist and continue. You help provide and sustain the ASK programs and we, the mentors and students of TF3, greatly appreciate it!


In addition, we would like to thank everyone who took the time to visit us in the hangar. It was wonderful to see such interest, and we all enjoyed your company!

Day 25 - May 3, 2014

Work continued on the stabilator and anti-servo tab pieces. Hinges were drilled and prepped, along with the skins; both components were then riveted on. The tabs are now complete and will be attached to the stabilator next session to complete the assembly.


Further sanding and trimming continued on the cowling pieces. Shaping those fiberglass pieces can be one tough and dirty job!


As for the canopy, the bubble itself was finally screwed onto the frame. The canopy foam blocks were then temporarily placed and will be trimmed and glued to the frame later. Then some further work was done within the cockpit on the instrument panel.


In the engine department, trimming began on the cooling shroud. Work proceeded on disconnecting and removing components to gain access to the cylinders, where the shroud will rest. Among the midst of the disassembling however, the engine mount was connected.


Day 24 - April 26, 2014

A mysterious wooden box was spotted in the back corner of the hangar this morning. The students and mentors were treated to the arrival of one very valuable and important component...the engine! So a few students helped to inventory the kit before jumping straight into disassembling it to add in extra components such as the cooling duct.


Further work continued on the empennage pieces. For the stabilator, the box spar and ribs were constructed and riveted together. The anti-servo tab involved some flange, rib, and control horn riveting.


The canopy bubble was positioned and match drilled into place. Then, with the help of some duct tape the side skirts were also situated and drilled in their proper areas.


Work began on the top and bottom cowlings. There was lots of trimming and sanding done to shape and fit the pieces.


Day 23 - April 19, 2014

With the tailcone completed last session, the majority of the students began construction of the empennage. Preparation and assembly included components of the anti-servo tab, vertical stabilizer, and the stabilator (a piece which combines the functions of both the elevator and horizontal stabilizer into one unit).


 Work resumed on the canopy with a couple of students helping position and fit the frame. Great effort was required to force the fixture flush with the fuselage sides, so when it came time for canopy skirt attachment, minimal dents and impressions would show. The baggage bulkhead and aft windows were temporarily installed on the fuselage to assist with the canopy bubble fitting. Some adjustments needed to be made, i.e. sanding the edges, in order to create a proper fit. The bubble will be positioned and ready for attachment drilling next session.


Day 22 - April 12, 2014

Well, the excitement of wing attachment appeared to be short-lived, as the wings were taken off today for adjustments. As removable wings, they required smooth installation and detachment in order to make them functional features. So some students and mentors spent the majority of the session helping make modifications to the flaperon controls and the wing attachment components.


The final steps were completed on the tailcone. With all sides riveted on, the assembly now stands upright in the corner awaiting further attachment. A couple of students helped with the servo tray and pushrod assemblies.


A student worked on the landing gear, specifically the wheel and tire assemblies, dusting the tires with talcum, installing the brake disc and wheel halves. Another student was occupied with constructing the fuel tank, countersinking, riveting, as well as some sealant application.


 As for the wings themselves, the tip light extensions were placed on and reinforced with some “flox” (mix of cotton fiber and epoxy).