Last week a Tuesday session was held at the hangar to finish up some of the wiring and begin work on the control cable systems. The rudder cables and the stabilator cables were run through the tailcone and stowed up in the front of the plane until further notice. Today was the full deal, with multiple people working on multiple projects throughout the day.
First off, although it may look like we made a ton of progress today, the tail surfaces were put on merely for test fitment and the fine-tuning of a fiberglass empannage fairing.
First off, although it may look like we made a ton of progress today, the tail surfaces were put on merely for test fitment and the fine-tuning of a fiberglass empannage fairing.
We attached the vertical stabilizer early on in the day.
The rudder followed suite shortly thereafter.
And eventually even the stabilator was attached.
These pieces were all attached to test the fit of this cone that fits over the gaps that are between the stabilator and the rudder when they are assembled on the airplane.
Because of a very confusing problem that we found in the wiring, one of the student mentors contacted an engineer at Vans Aircraft. So he came out today to take a look at the problem. It turns out it was not our fault that the wires did not line up as they should. He was at the hangar for over four hours, but he was able to find and solve the problem.
The cowling has almost been ground down enough for the seperate pieces to mate snuggly together.
There is a possibility the the tail surfaces may stay on until we are ready to permanently install them, for the only remaining things to do are to calibrate the control cables and attach them to the control surfaces.
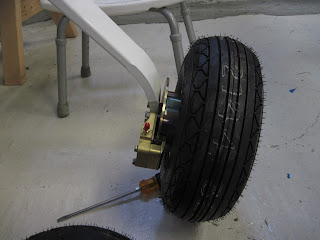
We also attached the right main landing gear. All that is left on this gear is to tighten the bolts, install safety wire, and grease the wheel bearings.
The control sticks were attached to the mixers that control the flaperons and the stabilator. The pulleys above the center tunnel are where the stabilator cables attach to the stick, and the "Y" in the center tunnel is where the flaperon actuator controls will be installed.
This is the wing flap actuator handle.
We will be back at the hangar next Saturday to continue our progress on the TeenFlight 2 airplane.


Awesome post and pictures! I was looking online at different cable manufacturers when I came across your blog. It looks like you guys are making a lot of progress with your aircraft! Thank you for sharing this with us!
ReplyDelete