Day 49 - December 22, 2012

After mostly finishing up the engine wiring, we moved on to the propeller.  The ground-adjustable, two-blade, composite Sensenich propeller was fitted into its slot on the propeller hub.  Two discs hold on the spinner, and after we attached the propeller, we tested the spinner clearance with the cowling.  We had good clearance with the bottom cowl half, but the top cowl half was just rubbing the spinner.  Later on, we made sure the spinner was on straight, and then we drilled the holes in the spinner attach discs.  


 We attached the stabilator to the tailcone (again) and hooked up the stabilator control cables.
 

Some of the students climbed into the fuselage and finalized the control system by using the plans to go step by step through the section to make sure all of the correct hardware was used in the correct order.  
 
Merry Christmas from the TeenFlight Crew!

Day 48 - December 15, 2012

Airway Science for Kids held a fundraiser-open house at the TeenFlight hangar this week during the latter half of our work day.  Lots of benefactors, donors, parents, and previous mentors showed up to support the program. 

Some of the students began working on the propeller assembly section.  Shown here is the propeller hub where the two propeller halves meet under the spinner.


We drilled holes in the side of the spinner where the propeller blades will protrude.  The aluminum circle next to the spinner is the spinner back plate.


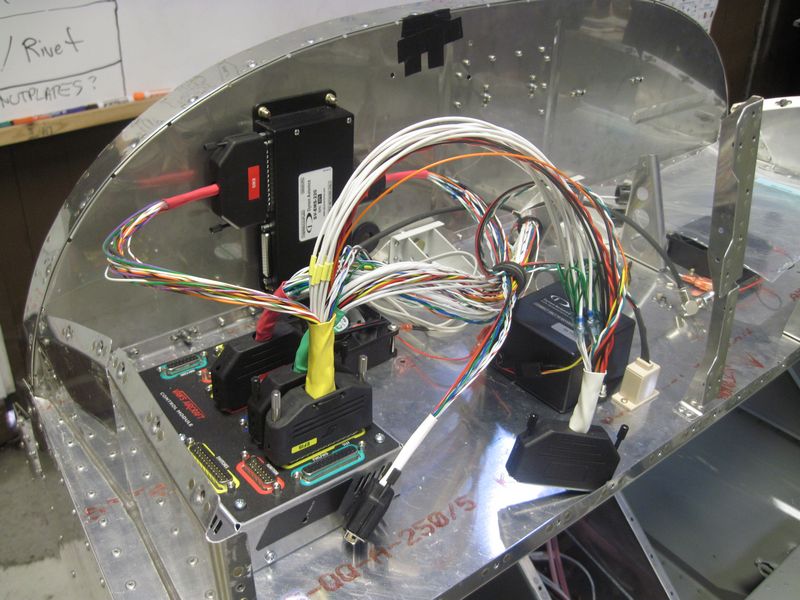
Some more wiring from the firewall to the engine was accomplished before the beginning of the open house as well.  There are only a few more things to be hooked up before we can start working on the exhaust system.

Day 47 - December 9, 2012

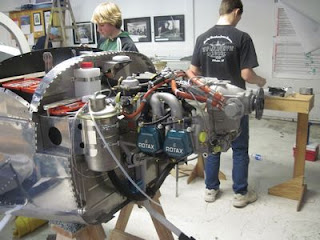
After many weeks of wiring around the firewall, we finally got to a point where we could hang the engine.  Between the avionics and the power plant wiring harnesses, there were quite a few sensors that had to be hooked up prior to engine installation (or else one would have to make up some pretty interesting arm gymnastics to fish the wires around behind the engine).  But after lunch, a few of the mentors lifted the engine off the table, carried it across the room, and a couple of us plunked the fasteners into place on the mount.  (It wasn't quite that easy, but...)


We mostly finished up with the avionics including the installation of the ADAHRS (Air Data/Attitude/Heading Reference System) in the tailcone.  It hooks up the the EFIS and feeds it all its information regarding your airspeed, attitude, heading, altitude, outside air temperature, etc...


We began installing the landing gear modification kit to satisfy the service bulletin Vans Aircraft published regarding the landing gear.


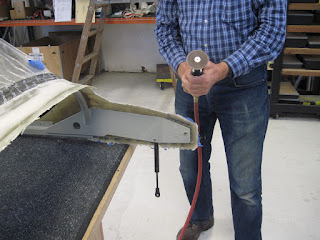
Our cowling pieces are getting really smooth.  We spread a thin coat of microballoon filler over almost the entire surface of the lower cowling half to fill some of the larger pinholes.  And then sanded it off again.


More next week!
Day 46 - December 2, 2012

After a hard day of work we almost completed the avionics installation.  Because our fuselage and empennage kits were manufactured and delivered before the new avionics update was made standard, we have had to do some drilling to provide holes for the new components.


Lots of wires!  Between the transponder, EMS, EFIS, intercom, ignition, com radio, backup battery, and switch panel harnesses there quite a few wires.  Thankfully all the harnesses come prepackaged so all we have to do is plug and play.


We routed the firewall-forward harness through the firewall.  It is ready to be hooked up to the various sensors and relays on the firewall.  The lower engine mounting bolts were attached to the lower firewall.  These bolts are also the bolts that hold the nose wheel to the firewall.


Another item to note is that our fuel tank passed its final pressure test this week! It is now ready for paint and eventual installation.

Hopefully we will hang the engine next weekend!

Day 45 - November 24, 2012

The fiberglass is nearing the end of its smoothing process.  We applied another layer of filler to it just to make it super smooth.


We sanded the upper cowling half a little bit and exposed all of these pinholes that will need to be filled before we paint it.


Here is the lower cowling duct that guides air from the front of the cowling to the oil cooler near the firewall.


The battery and oil tank were installed on the firewall.


And so was the oil cooler.

    
Our avionics started to go together with the installation of the computer module, the EMS (engine monitoring system), and the Dynon backup battery.  We have it pretty easy though compared to most homebuilders, for our wires come in prepackaged bundles so we can just plug-n'-play.


More next week!

Day 43 - November 10, 2012 & Day 44 - November 17, 2012

The engine is continuing to come together for its application in the TeenFlight airplane.  The cooling shroud that fits snugly over the cylinders to effectively cool them uniformly was hacked to size and then glued onto the crankcase of the engine using high temperature silicone RTV.

One of the last steps of the engine customization is the installation of drip pans underneath the carburators. 


We wrestled the engine mount onto the back end of the engine and torqed down all of the bolts that hold the mount to the engine.

Shown here is the clamp assembly where the different fuel hoses are held together.


After failing many pressure tests we figured out that the "visual fuel level check window" was the culprit of our less than air-tight fuel tank.


More sanding on the fiberglass lay-ups was completed.  It is becoming really smooth.  The crew that has been working on it spread another layer of fiberglass filler over some of the low spots.


When we arrived at the hangar on Saturday there were multiple boxes sitting on one of the tables: The Avionics Kit.  (Shown here is the larger-than-iPad size screen of the Dynon SkyView D1000 PFD)
Happy Thanksgiving!

Day 41 - October 27, 2012 & Day 42 - November 3, 2012

Over the last two weeks, the TeenFlight crew has been working on the engine preparation and installation process.  Although the engine comes completely assembled, there are a lot of little things to tweak on it to suit its application and compatibility "under the hood" of the RV-12.

 One of the things that the RV-12 requires is the installation of a cooling shroud that fits snugly over the top of the main part of the cylinders.  This requires that we remove the carburetors, the ignition modules, and the cooling system, and flip them back to access this area.


This is how the cooling shroud fits over the cylinders.  After it is trimmed down to size, the gaps between the fiberglass and the engine will be filled with RTV (Room Temperature Vulcanizing) silicone caulk.  The purpose of the cooling shroud is to directly blast air evenly onto all four of the cylinders by way of a hose that runs from the cowling to the top of the shroud.


Other pieces of the firewall-forward kit that we worked on were the oil cooler and its bracket.  It will eventually be installed under the engine and will face forwards out of the cowling.
 
More next week.

Day 40 - October 20, 2012

TeenFlight 2 has been working for forty Saturdays.  At ~ six hours per session times ~ ten builders = ~2400 man-hours of build time (plus weeknight sessions).  WOW!! That is a lot of time invested on this project in just over a year.

Anyway, when we arrived at the hangar on Saturday, we were greeted (not unexpectedly) by an exhaust manifold, some miscellaneous parts, and a long box that said Sensenich on it.  Around 11:30am Mr. VanGrunsven pulled up outside of the hangar with this in the back of his pickup.


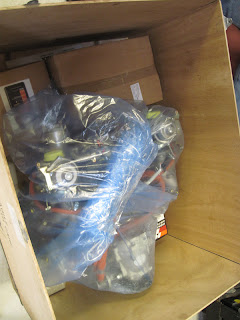
That's right! a brand-new Rotax 912uls 100hp aircraft engine.  The excitement was humming.


After un-crating it, we set it on the table and let it sit while we worked on finishing up other projects.  It would make a lovely (and very expensive) coffee table decoration.


We finished the fiberglass lay-ups and applied the second coat of micro-balloon filler.  Then after lunch we peeled it off the airplane and got to work with the trimming.


After the main trimming, we did some on-plane trimming to trim away the glass that interfered with any other part of the plane during its opening rotation.  To avoid cutting more than just the intended glass, we slid a piece of tungsten behind the glass as a trim plate.  As you can imagine, when the die-grinder cut through the glass and hit the tungsten, there was a pretty cool pyrotechnic show.


The oil door was riveted to the upper half of the cowling with some very flush rivets.


As part of the firewall-forward kit, the cabin heat door was clecoed to the firewall.


Here is the hollow composite prop that will eventually be chopping the air at the front of the plane. 


Day 39 - October 13, 2012

Arguably the most difficult part of the entire RV-12 build, the fiberglass lay-up around the canopy is unlike the other parts of the RV.  Instead of manhandling metal into submission, this careful procedure requires concentration and patience. 

After completing the right side of this section on Tuesday, we finished the left side and center lay-ups.


A camera crew from the Port of Portland came out to photograph us while we were working.


Another item of interest are the wingtip light fairings that were permanently adhered to the wingtip with Proseal and rivets.


 Engine and avionics soon!  More next week.


Day 37 & Day 38 - September 29 & October 6, 2012

Sorry for not posting an update last week, I felt that we did not make enough progress to warrant a blog post.

Day 37:


Our second week back from summer break, the mentors were very surprised when only two students showed up. This limited our progress a little, but we still were able to progress on the canopy.


 Day#38: 

 
 There was more of a student turn-out for today.  Six students came to work for six hours on the airplane.
 
The holes in the lower cowling were drilled and the rivets squeezed to hold the hinge in place on the cowling.


What!! Missing rivets! But I checked that twice!  Yep, sixteen missing rivets were found in the vertical stabilizer.  This was fixed immediatly.
 
 
The big news is that the canopy is screwed to the canopy frame and the skirts are riveted to the canopy frame.  After letting the epoxy cure all week on the pink foam, we sanded the foam to fit the contour of the forward fuselage.  The fiberglass cloth is cut and we are waiting until next session to begin the lay-up process.